

ON THE PAGE
And I say that as someone who was taught how to bake bread by a master of the art – my grandmother, Marie. She made her family’s bread for decades. She taught me her method, which starts with the water leftover from boiling potatoes. I’ve attempted to make it several times from my girlhood notes, and it’s just not…the same. Fifty years later I’m still spoiled. Plus it takes more time and attention than I want to give.
It also uses a variety of skills to pull the whole thing off. So when I saw “no-knead” bread shared I thought, well, hmmm, that would be easier. I checked out the recipe. No way, I thought. It can’t be that simple and still produce actual bread.
King Arthur Flour’s No-Knead Peasant Bread Recipe
But it is and it does! This recipe, courtesy of the fine people at King Arthur Flour, is easy. Short ingredient list, and not very many tools. This is the recipe to get anyone started baking bread.
It’s quick, as time is measured in bread baking. Two and a half hours later, you’re taking hot bread out of the oven. And it stirs together easily by hand, so there’s no hauling out a mixer even.
It takes out one of the steps, kneading. That means no flour all over the counter.
Plus I’ve developed some tips and tricks to make it even better. I’m sharing them for your sake, sure, not because my memory sans estrogen sucks. (That’s also why I immortalized the recipe and steps for chocolate nut candy made in the crock pot.)
Go to the Source – the Experts
I’m not going to repeat their recipe. Because I think it’s important to follow their instructions, step by step, the first time. It’s described well, even if you’ve never baked bread before. Let the experts take you through it. Read it all the way through, assemble ingredients, and go for it!
- The only missing detail is that “lukewarm water” isn’t very specific. You want the water between 105 and 115 degrees Fahrenheit. It should feel noticeably warm against the back of your hand. Hot, but easily tolerated. But not so hot your skin turns red.
- You can easily make the recipe vegan by using vegetarian cooking spray or olive oil instead of butter to grease the baking dish.
- Secret bonus: There’s no fat in the dough, so clean up of the mixing bowl is quick and easy with hot water and a bit of dish soap.
So give it a try. The next time you want to make it – and you will – hop back here and have a read through my tweaks, variations, and general tips I’ve discovered along the way.
You can do this! I promise! Once you’ve taken your own fresh bread out of the oven there’s no looking back. (After that, try the best oatmeal cookies ever because you are a baking badass.)
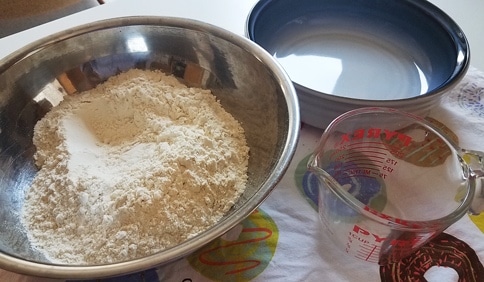
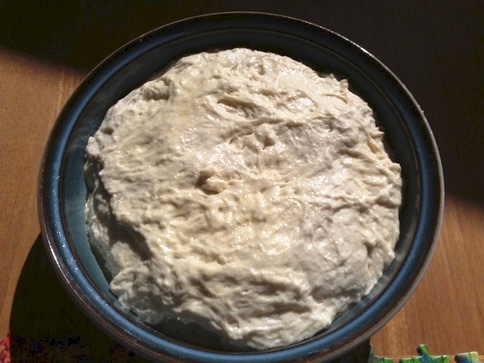
Here’s my favorite baking dish and bowl for this project, with the 4 cups flour to show how much room you’ll need for the first rise.
General Tips
Making the Dough
- Make sure your yeast is fresh. One way to be sure without wasting any of the precious stuff is to stir the yeast into the lukewarm water instead of the dry mixture. Give it a little stir. You should see tiny bubbles forming right away. Then pour the water quickly into the dry ingredients and start stirring.
- I prefer mixing the dough in an ordinary old stainless steel bowl that’s wider than it is tall. The 4 cups of flour fills it about 1/3 (see picture). The dough pulls away from its sides easily, and if it’s chilly in the house, I can heat the oven for 90 seconds, turn it off, and put the bowl in there to rise. Plus it spins like a top on the counter when deflating the first rise dough as instructed.
- This is a no-knead recipe, but after the mixture forms its sticky, soft ball, I will continue working the dough in the bowl (press down, circle with spatula, turn over, repeat) for about a minute to work up some of the gluten that kneading would bring to the party. I have no idea if it makes a difference but it seems like something my grandmother would do.
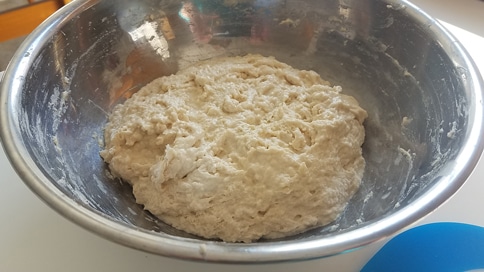
The first mix of ingredients is all done. Get ready for the miracle of yeast + salt + sugar + warmth + time!
First Rise, Plus Weather Impact
- Yeast is greatly affected by the temperature of the place where it will rise. In the winter when the house is 65-70 degrees, I’ve found I need to slightly heat the oven (turn on long enough to be 80-90 degrees at most) and rise it in there. In summer, any warmish place not in direct sunlight will do. In winter, it’s usually the full 90 minutes for the dough to double in size. In summer, it can be as little as 60 minutes just sitting on the counter.
- Use plastic wrap, not a tea towel, to cover the dough while rising. This dough is STICKY and in my bowl it always rises just above the top. The dough will slide right off plastic wrap, but cling like a mess to cloth.
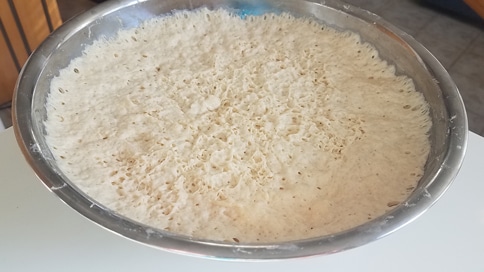
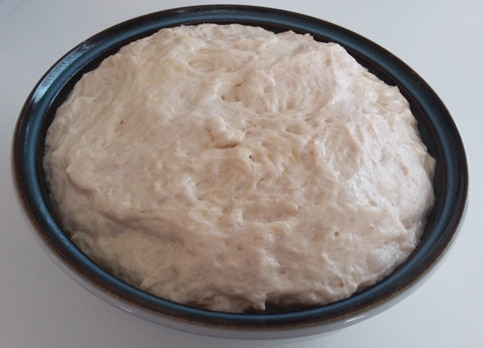
Here’s the first rise completed. It’s already deflating a little bit because I moved it from its warm spot.
- I absolutely endorse the two forks method in the King Arthur Flour recipe. It works like a charm to pull the dough from the sides of the bowl and knead just a little bit.
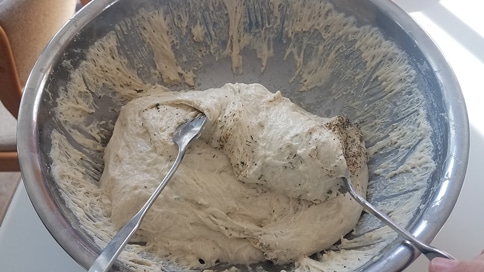
After bread rises the first time, it’s “punched down” to let out the yeast bubbles so it can transfer to its baking dish for the second rise.
- After you’ve used the two forks to deflate the dough, you can scrape off any that still clings to the sides of the bowl and plop it on top of the dough ball.
Second Rise in the Baking Dish
- Dough and baking dish can be heavy – always lift with both hands.
- Cover every bit of the inside of the baking dish with the lube (butter, cooking spray, etc.). Get it all the way to the rim. The fat not only makes it easier to remove, it reacts with the dough to create a crispy texture on the sides and bottom. However, don’t have so much that there’s a standing layer. Regular olive oil tends to pool at the bottom which is why I prefer olive oil cooking spray. Too much oil can make the outside chewier than I like.
- My preferred pan lube is butter-flavored cooking spray. You don’t get a lot of taste, but you do get a lot of aroma and color. Olive oil spray works too.
- I have a salt tooth, and I like sprinkling a quarter- to half-teaspoon of kosher salt on the baking dish after I’ve sprayed it, before the dough goes in for the second rise.
Ready for the second rise!
- My preferred baking method is as one single large loaf, though I’ve separated it into two smaller loaves so I can do one plain and one with herbs, or to give one of the loaves away. But most of the time I use a round stoneware baking dish about 9 inches across and 3 inches deep. As you saw at the King Arthur site, they use a much taller, narrower Pyrex baking dish.
- Same rules apply for ambient temperature needed for the first rise.
- The second rise you don’t cover it.
Second rise is done, it’s time for the oven.
Baking
- Just before I put it in the oven, I lightly spray the top with more cooking spray. It puts a little more crunch in the crust. Butter-flavored spray really brings out a deep golden color.
- The oven temperature change as specified in the King Arthur Flour recipe during baking is really important, so stay close. If you leave the kitchen, take the timer with you. Use your phone’s reminders and set it to ring loudly.
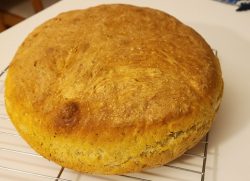
- This is a damp bread when done, so err on the side of cooking a few minutes too long versus a few minutes too short. The color you want is a deep golden brown (see picture of loaf that could have used another 3-5 minutes).
- Use an oven mitt on each hand, and lift with both hands when removing from the oven.
- After you’ve set it on a surface to cool, thump it with a fingertip and listen to the hollow sound. It takes experience, but the less muddy or wet the sound is, the more done the loaf is. Also, if you have onlookers, thumping it will seem properly badass.
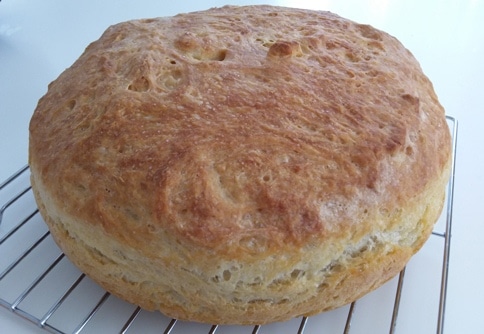
This loaf needed maybe 3-5 more minutes in the oven. You want it even darker golden brown. Still delicious, especially toasted.
After Baking
- I don’t even try to tip the loaf out of the baking dish until it’s been out of the oven for at least 15 minutes. Long enough that I can pick up and firmly grip the dish with my bare hands.
- If all goes well, turning the baking dish completely over and giving a good shake makes the loaf drop out.
- If the loaf won’t release and pop out, it means you possibly could have used more lube. *ahem* Leave it for a while so it contracts and that might break its contact with the dish. If it’s still stubborn use the non-cutting edge of an ordinary table knife between the pan and the loaf all the way around the sides. Gently rock it to see if the place that’s sticking will crack without further violence.
- Last resort: Turn the dish fully upside down, grip it firmly, and start shaking. Trust me, even if at this point it tears, it’s still perfectly edible.
- Setting it on a cooling rack helps the bottom stay crisp. You don’t want a soggy bottom! (#GBBO and #MaryBerry rock!)
- As tempting as fresh, hot bread is, until the loaf has cooled down a bit, it’s really soft, so hard to cut without also crushing. Give it 30-45 minutes at least. I’ll admit the very first time I made it I burned my fingertips trying to cut a slice for, uh, quality control purposes.
Herbs turn it into a great savory bread. So pretty. So yummy.
The Herb Variation
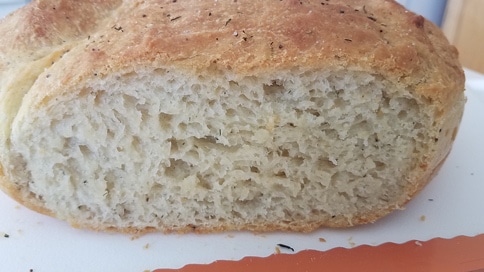
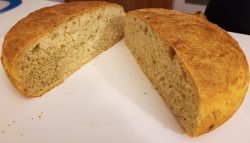
The texture of the bread is coarse with large bubbles, making it really excellent toasted the next day. It handles jam, butter, olive tapenade, smashed avocado, you name it. It’s also great as a mopping up bread with soups and gravies.
If I want to be sure to have the flexibility to enjoy it with both sweet and savories, I make the recipe as stated. Sometimes, though, I really want a savory version with herbs. I have a delicious salt-free herb blend (marjoram, thyme, celery seed, chives, parsley, paprika etc.) with a touch of black pepper that is perfection. Herbs de Provence or an Italian blend – or a “Mrs. Dash” type salt free blend – would be delicious too. Stick with salt-free if possible to avoid giving the yeast more salt during the first rise.
The herbed version cries out for tapenade or dunking in tomato soup. Or to be smeared with garlic butter and sprinkled with Parm.
- For herbed bread add two teaspoons of the dried herbs to the dough during the original mixing stage.
- If you want to do two loaves, one plain and one with herbs, complete the first rise and then separate half and move it to its prepared baking dish (a standard loaf pan will work). Then add 1 teaspoon of herbs, gently incorporate into the remaining half, and move it to its baking dish.
- When lubing the baking dish I sprinkle the dish with some kosher salt and some herbs.
- When I spray the top of the loaf just before putting it in the oven, I also dust with a little more herb, making for an attractive top.
Other Variations
I’ve also dusted the herbed loaf and the pan with grated Parmesan cheese and just see what happens. Result: delicious, but the parm got very dark because of the initial high heat. It was definitely tasty, but I’d probably not do it again.
Several times I’ve also baked it in a nonstick 13×9 rectangular pan for the initial 15 minutes at 425 and then 20 minutes at 375. Small cubes of mozzarella or half slices of pepperoni poked down into the came out delicious. It was sliced and eaten sooner, and would be a great accompaniment to any pasta or soup dinner. Toasted next day, slice of cheese added…yum.
If My Son Can Do It You Can Too
Proud mama moment. My 26-year-old son watched me months earlier make a batch, then tackled it himself based on the original recipe and my blog. Perfection! He didn’t spray the top the way I do and the top was therefore softer and easier to cut. Another way to enjoy it, entirely a personal preference.
-

- Nice hollow sound when thumped and a swirl that reminds me of a Van Gogh sun.

-

- Perfect crumb, perfect distribution of herbs, and delicious, every bite.

About Nutrition
See the King Arthur nutrition info for all the deets. If you are superhuman and you can slice it into 20 servings, it’s 90 calories a slice. That’s a big IF, though. We fall on it like ravening wolves. When my son was visiting, and we made it together, it didn’t last long enough to count anything.
Other Recipes I Love
This is not a recipe blog, and I’m not trying to monetize your eyeballs. I only do a recipe when I really, and I mean REALLY, love the result. Check out my Cheery Cherry Oatmeal and Dark Chocolate Cookies. They’re worth it.